Tuesday, September 25, 2012

Puppy Love or Not...LOL


I forgot how much fun work you have with a puppy. Getting ready for Canton and got a few things out of the building, came into the house and guess who decided I pulled it out for him. Even got into hubby's golf balls. Gotta love him though.

Keep Stitchen'
Bonnie

Monday, September 17, 2012

Getting ready for the big show in October. Sew, Sew, sewing gotta keep busy. Come see us if you can at Canton, Texas Row 46. Huge Show. More photo's at

Keep Stitchen'
Bonnie

Friday, August 17, 2012

Dressed my tree today!


Getting ready for the busy season at Canton and I haven't been blogging much. I do get on face book and pinterest, it seems to be faster for me. Come on by and visit.


Hope to post again soon,

Keep Stitchen,

Bonnie

Friday, June 22, 2012

38 Years and it's not my AGE!


Thirty eight years ago we started our journey as man and wife, but we really met in the seventh grade and I came home and told my Mom who I was going to marry, little did she know I meant it. This first picture is when we were in High School, boy it doesn't seem that long ago. Looking at these pictures I see how important sewing was in my life then. Remember the pant suits that were in at this time out of knit, I really miss the fact you just washed it and NO IRONING.


I think I was beading me wedding dress up until the night before the wedding. Still have it just wish I could fit into it.

Then this is us leaving for our Honeymoon. Made our going away outfits, even his. Wonder if I could get him in another one. I think he would of wore anything at this time, young love. LOL


Have a great day and Keep Stitchen'

Bonnie

Tuesday, June 12, 2012

What have I been doing...???


A
Working on my Vintage Baby Line for Canton and orders, can't keep up and as Martha would say "That's a good thing".

A

Baby on the Go Bags, handy to carry for a short trip.


And I can't say I've been planting and seeing to our Garden, my husband takes care of it, I'm waiting to do some canning. I just don't mix with HEAT, staying in and sewing has spoiled me to the air conditioner. This is an earlier picture and it has taken off and soon to be picked.


A

There's a new blog you need to visit, these girls are next to us at Canton and their booth is fantastic. They fit in with the look, cute as can be and a hoot. Just click on the picture to go to their blog.
A


Keep Stitchen' Bonnie


Wednesday, May 9, 2012

Going on Vacation!!!

We love to go on vacation to Florida and just happens to be the weekend of the Players PGA Tournament. Can't wait to relax and enjoy. Will be coming home sewing up a storm for the next show. Lots of vintage dresses to be made and a couple of baby quilts. Talk to ya soon. 

Keep Stitchen'
Bonnie

Friday, April 27, 2012

I've been out of commission, and it all changed


Not sure what I'm doing on this new blogger, but we will see when I publish this post. 

Well, I've been out of commission due to a sciatic joint going out, no sewing until now and I've been creating some vintage looks for little girls. These have already sold, so more styles will be listed soon on Calamity Jane's Cottage soon. The top picture is a belt for a little girl and then every girl needs some Lacey Capri's.

Hope everyone has been doing fine.

Keep Stitchen'
Bonnie

PS: I'm saying this is a test post. 

Tuesday, February 28, 2012

Moda Bakeshop Sliced Contest entry "Sit and Sew"


Moda Bakeshop is having a contest and you can click on the picture to go to the site and read all about it. Finishing touches for the "Sit and Sew" entry are being done. This is a child's chair you can sit on your cutting table and have all your tools handy, a large pincushion seat, scissor holder, magnetic board to put your notes and a project tote. Fabric used is Moda's Hello Betty by Chloe Closet. (Honey Bun). Can't wait to share this tutorial it was really fun to make.


Keep Stitchen'

Bonnie


Sunday, February 26, 2012

Tutorial-Project Board- Sewing Room Project


This is an item I want to have in my sewing room and since I'm moving to a new room, I'm making some accessories to add to it.


I found an old frame for $5.00 and it is big enough for the project. Poster Board and Cork Tiles were found at Hobby Lobby with my coupon so this has turned out to be a very reasonable project to make.
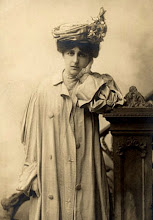
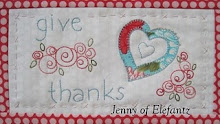
Cut the poster board to fit and slide in the back of the frame. You can tell this frame is old, has the good old vintage look.


I forgot to take a picture before I opened the tiles and had to undo the wadded wrapping. They were $9.99 with 40% off and they come with the sticky attachments to adhere the tiles to the poster board.


Now measure your tiles to your frame and cut with sharp blade.
Then peel and put the sticky squares onto the back of the tiles


Turn over and press to poster board and you have an accessory to pin pattern pieces, quilt instructions, list for your next project and so on. I'll show pictures of it hanging in my sewing room as soon as I get some walls painted.


Now below is going to be another project and can't wait to finish it and show.


This is a child's chair and I will show you I drilled a small hole in the seat.


Keep Stitchen'


Bonnie


Monday, February 20, 2012

Countdown for next Show and New Styles


Back to the sewing room to make Little Girls Dresses for the next show. I wanted to venture out from the dress that always sales to something a little different. It has been fun mixing and matching patterns and coming up with new items, even using a quilting ruler to add more detail. Love the vintage look for adults and think it really is cute on little girls for photo's.


I am getting to sew a couple of quilt blocks in between so hope to have a quilt finished to show soon.


Keep Stitchen'

Bonnie

Friday, February 17, 2012

Quilt Show in Beaumont, Texas

I have been bad again not posting. Not sure why I can't seem to sit down and post. I have pictures in my camera of our Guild's quilt show and will be posting them soon, having a booth I didn't get out as much as I wanted. Very talented ladies!!! Now I have two sites that have posted pictures of some of the quilts that I am leaving with you to enjoy. Great Show and so well put together.

a


a


Keep Stitchen'

Bonnie

Sunday, January 15, 2012

Little Girl's Purse Tutorial

Little Girl's Purse Tutorial


Supplies Needed


2 Fat Quarter (enough for two purses) I should of used two different fat quarters so you could tell the right side of the purse from the wrong side. Sorry.


1 piece of batting 18" X 22"


2 pieces of binding measuring 2 1/4" X wof


1 Piece of ribbon 30" long for handle


Velcro


Large button of your choice


With 2 fat quarters sandwiched between batting I quilted the whole piece. It is easier to quilt a larger piece of fabric and you have two purses in no time. Quilting can be done anyway you choose, see mine below.


Now you are ready to cut two pieces measuring 13 1/2" X 20 1/2.

Take one piece of fabric and fold from the bottom up to 7 1/2", see mark below. Iron crease on bottom fold to mark fabric. This is the bottom of the purse where you folded it.

I took a saucer at this point to round off the top edge of the purse, you can use anything to make a curve.


Trim top edge of purse.


This is how it looks before sewing.


Cut binding 2 1/4" X wof.


Sew together ends as shown below. I put of piece of tape just to show you how to piece the binding together.


After sewn trim away edge.


Iron seam open.


Now press binding in half, long edges together. I love pressing on a towel.


The first seam to sew is attaching the binding to the edge of the purse that is straight. It measures 13 1/2" long. I sew a 3/8" seam with my quilting foot.


After attaching binding you trim away ends.


Fold over binding and pin down, if you use these measurements and fold it over the top edge it will be longer in the back and you will catch the seam when you sew the binding down on the right side of your purse. I sew in the seam and you cannot see it from the front.


This is how the inside binding of the purse will look.


Now attach binding all around the purse outer edge and curve. Go slow around the curve. Cut small slits around curve so it folds back easier. I don't trim my fabric away due to wanting the 3/8' seam, so the binding folds around it at the right measurement. Then fold back and sew on the right side of the purse in the seam.


Remember the crease you made with the iron folding the bottom up to 7 1/2", fold the bottom back up, pin and sew the sides of the purse edge.


You can use any width of ribbon, but mine was a little wide so I folded it in half and stitched it together.


Attach ribbon to purse on the inside where purse opens and sew on Velcro. I used what I had and I know tan does not go with these colors but gotta work with my supplies.


I embroidered "Be Mine" several times and cut out the circles for the big covered buttons.


Attach button and you are finished. I hope these instructions are understandable.


Keep Stitchen'


Bonnie

Related Posts Plugin for WordPress, Blogger...